What is it with boys and trains? When Onetime was 2 – he was obsessed with trains for close to half a year. And when it came time to plan a birthday party, the theme was a no brainer!
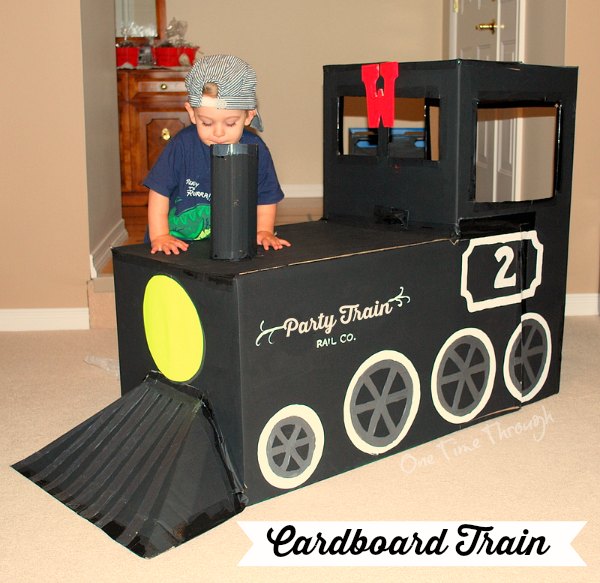
Today you’ll find instructions to make the awesome cardboard train that I made for his train birthday party, as well as links to other fun cardboard creations that you can make for cheap pretend play.
This post includes Amazon Affiliate links. Please see my Disclosure for more details.
How to Make the Cardboard Train
Supplies:
- two large rectangular prism shaped packing boxes (just don’t get cubes!) – I got mine from Home Depot
- black duct tape
- black
 and white acrylic craft paint
 - yellow construction paper
- scissors
- Optional: a wooden letter of your child’s first or last initial with red acrylic paint
Construction:
On both boxes, tape one end completely shut using the black duct tape. These make the front end of your train (horizontal box #2) and the top of the cabin of your train (vertical box #1).
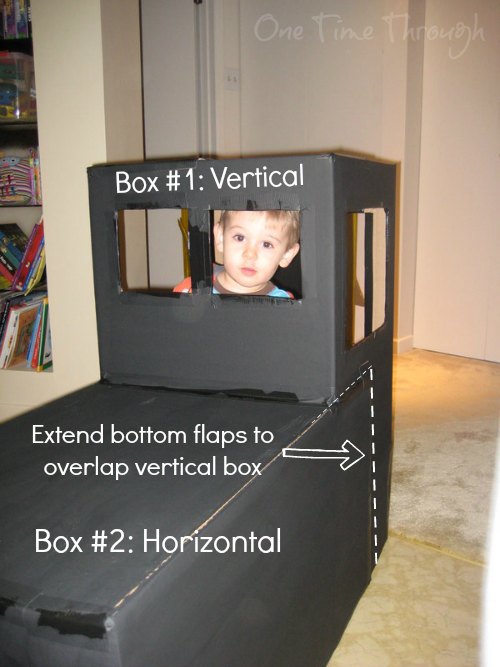
On box #1, you want the box to be as tall as possible, so extend the flaps on the open end and tape the sides together to create a rectangular prism.
To attach the two boxes, extend the open end flaps of the horizontal box and wrap the two side flaps around the vertical cabin box. Tape in place.
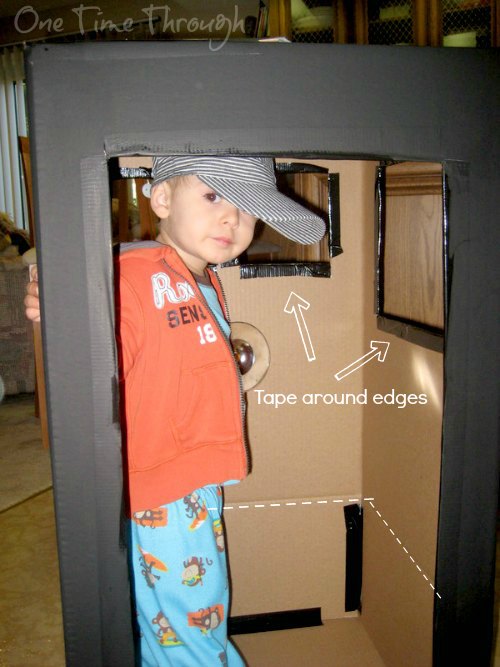
Now you can cut out a front window or two from the cabin. Be sure to tape around the edges if you want your train to look more polished!
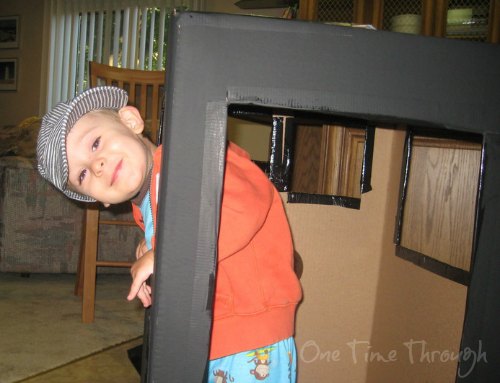
Remember to cut out a back door so your kiddos can get in the cabin – as well as two side windows. Tape the edges of the door and windows. Tape any other edges of the boxes that are rough.
Fold a rectangular piece of cardboard into a tube and tape to the front of the engine to make a smokestack.
To make the front cow catcher, take a rectangular piece of cardboard and score the sides of a parallelogram and then fold. It may take a little trial and error, but eventually you’ll get it to look just right. Tape the edges.
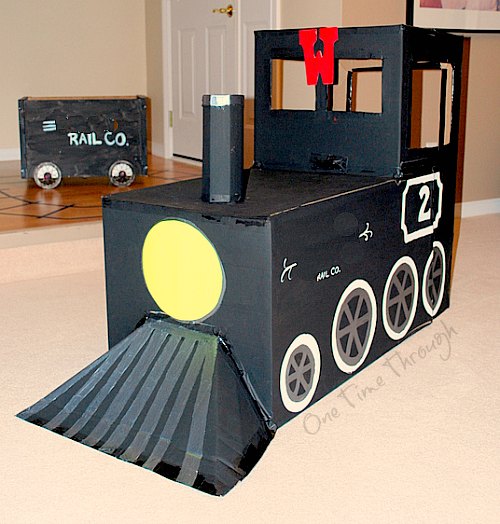
To complete your train, paint it using the black and white. I traced around bowls from my kitchen to get the wheels looking so nice.
To add a personalized touch, paint your child’s last name across the side of the train along with the words “Rail Co.” and then add their age number on the cabin. You can also glue on a red painted wooden letter with your child’s first or last initial.
Cut out a large yellow circle for a front light and glue or tape on! All done!
Other Cardboard Box Play Ideas:
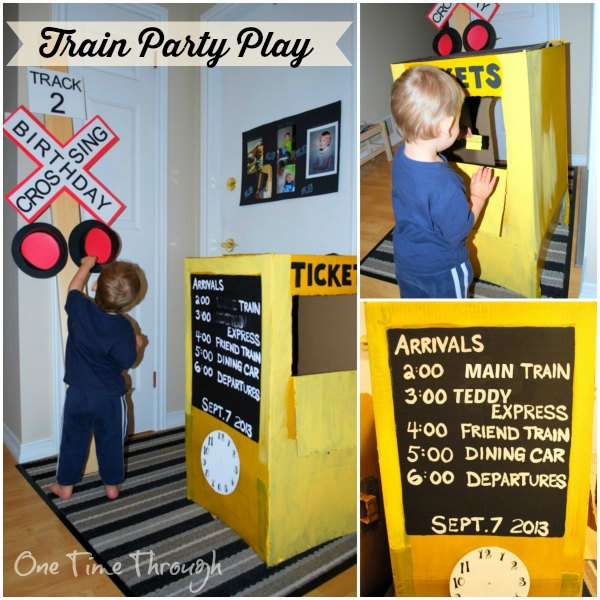
Make this adorable ticket booth to go along with your train!
The firetruck construction is similar to the train with a few tweaks!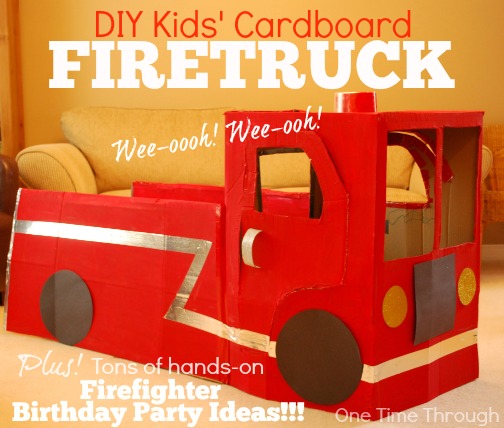
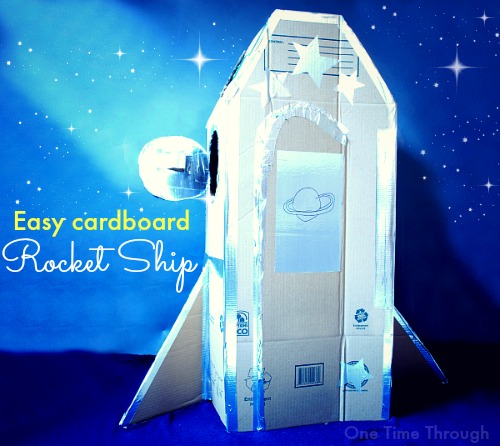
A rocket ship to blast off to outer space will get the kiddos started on some out of this world adventures!
Pirate Ship: Living Off Love and Coffee
Cardboard Box Reading Castle: Growing Book by Book
Hope you enjoy checking out some of these easy cardboard toys to make for your kids and that they get as much fun out of them as we have!
Find even more ideas and resources for kids birthday parties on my Pinterest board!
Keep on chugging!

![]()
Love this, double fun. Parents will have a great time building them, and the kids will play with them for days until they collapse from overuse.
When I bring big boxes home from work, my 3 kids – 3, 6 & 8 will play with them for weeks, while their plastic toys sit in a toy room 😉
Medela