I’ve got a fun project that you can make by yourself – or with your kids – for a unique personalized word cloud Father’s Day gift this year. My 3 year old son, Onetime, had fun making this gift with me and I know his Dad will love it!
I’ll take you through these easy steps, then give you ideas for how you can make your word cloud into an awesome and unique gift – sure to be cherished for years!
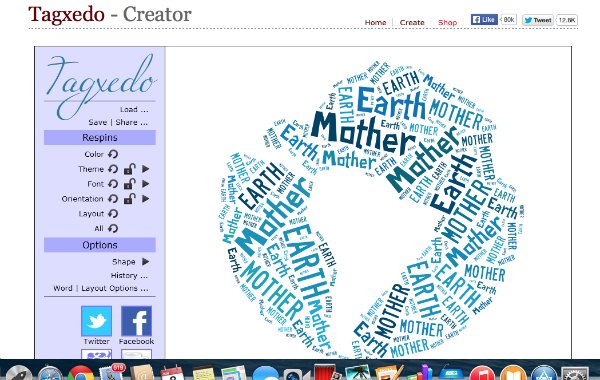
To make your Dad (or Grandpa) a word cloud, you first need to visit the site: Tagxedo.com and click on “Start” or the “Create” button. (Just a heads up that this program doesn’t work on the Chrome browser. We used Safari.)
You may also need to download the Silverlight software if you don’t already have it. You can always remove it after you’re done if you want.
Once you click on Create – you will be directed to this page below.
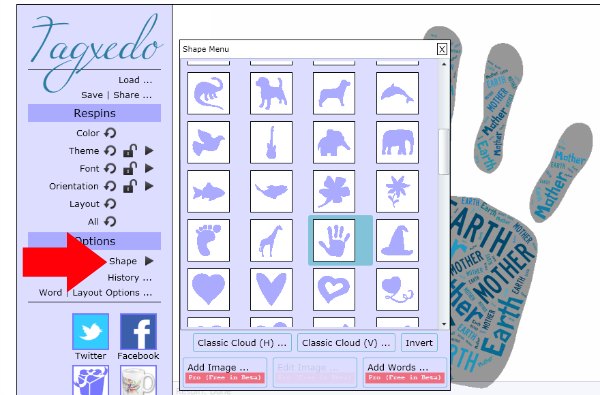
The first thing that I did with my son was choose the shape of our word cloud. I put a red arrow to show you where to click to bring up the choices.
Onetime initially wanted to choose the snowman, so we had a chat about choosing a shape Dad would like and that he could display all year. He finally picked the handprint!
I’ve also used the heart shapes before and they look very nice, as do the tree and the LOVE shape. If you just want a classic horizontal or vertical cloud, the buttons are at the bottom of the shapes.
Once you have decided -just click on the shape and it should change immediately on your screen.Next, we chose the colour “Theme.” These are the colours that your words will end up being.
As you click on them, your shape will change to show you what they look like.
In each swatch rectangle, the inside colours are what the words in your cloud will be, and the outside of the rectangle will be the colour of your background.
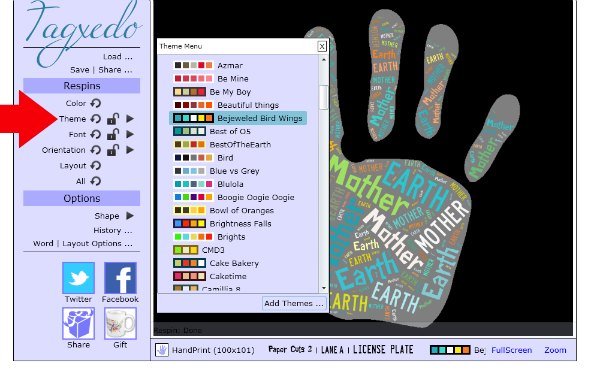
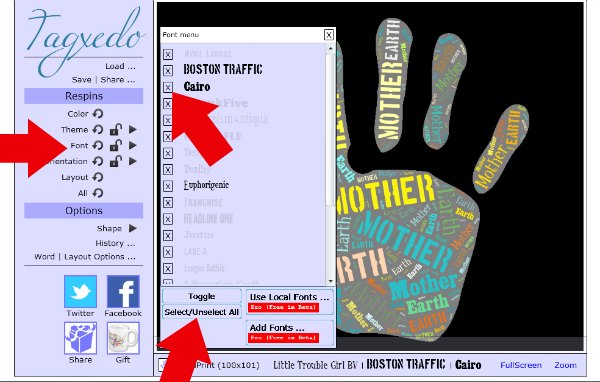
Simple black and white looks awesome too by the way! But Onetime chose “Bejewelled Bird Wings!”Now you can choose what fonts you would like your words to be. You can go with 1 font, 2 fonts, or 3 fonts.
We chose 3: Boston Traffic, Cairo, and Euphorigenic by unselecting all the fonts at first, then clicking the X next to the three fonts we wanted. When all 3 were picked, we clicked on “Font” at the left sidebar and our choices were applied to our preview.
I like to choose at least one font which is all capitals, and one that mixes capitals and small letters.
It also looks nice if you choose 1 font with no serifs and 1 with serifs. If you’re not sure what a serif is – click here.
Now that you have your word fonts and colours, you need to decide how you want the words to be aligned. Click the “Orientation” button.
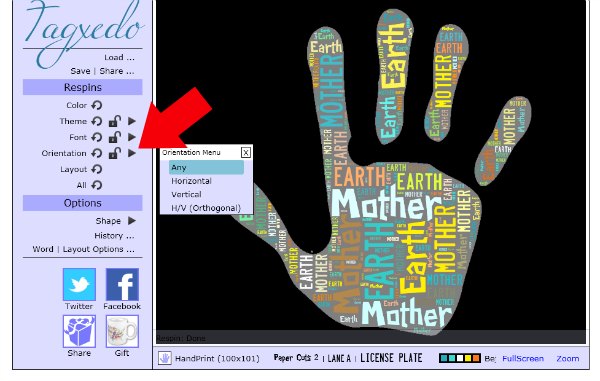
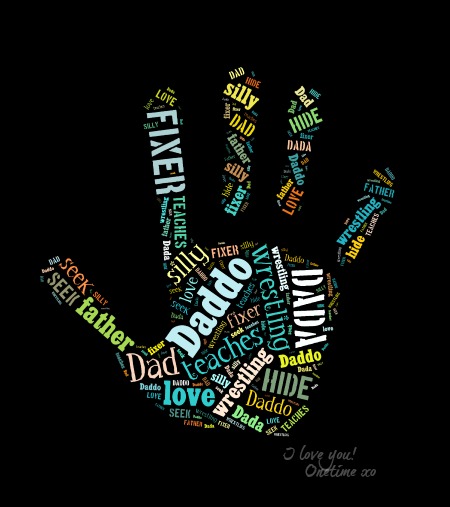
You can have them be all vertical, or all horizontal, or a mix of vertical and horizontal (see the hand below), or all directions (the hand above.)The last step to create your cloud is to personalize your words!
Click on “Load” at the top of the left sidebar. A screen pops up where you can type in words that you want in your cloud.
To get these words, I asked my son a bunch of questions about his Dad like:
– What are your nicknames for Dad? (Daddo, Dada)
– What does Daddy do? (teaches)
– What do you like to do the most with Dad? (wrestling)
– What is Dad really good at? (he’s a fixer)
– What is your favourite game to play with Dad? (hide-and-seek)
– What do you love about your Dad? (he’s silly)
– What else do you want to put in about Dad? (love)
I also included the words “Dad” and “Father”… just because.
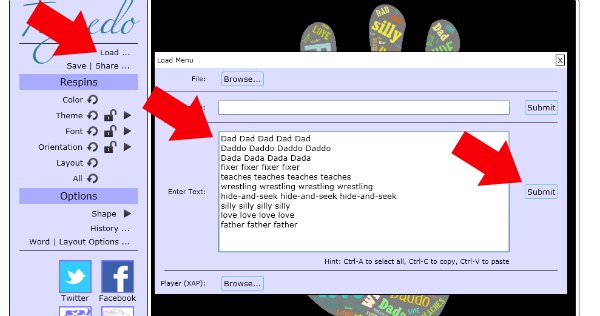
The reason each word is typed in multiple times is because the more times you type the same word, the more it will show up in the word cloud and the bigger it will be.
I wanted Dad to show up the most and the biggest, so I typed it in 5 times. Words that you want to show up smaller or less often, type in fewer times. You can experiment a bit here until you get what you like.
As soon as you click on “Submit” you will be able to see your own words in your shape.
Although I didn’t include a picture of it, you can now click on the circular arrows in the left sidebar to “re-spin” the colours of the words (Colour), or where the words are (Layout), until you see the word cloud you are happy with!
Warning! If you spin any of the others (Theme, Fonts, Orientation, All) you will changes some of the choices you already made.
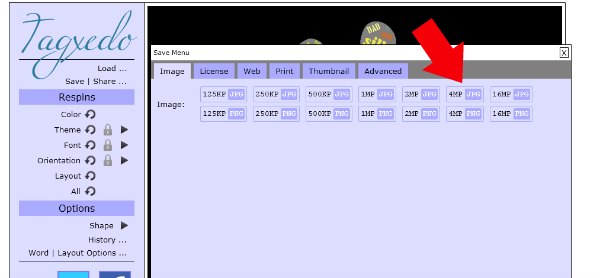
Once you have found the word cloud you like, you should save it as a JPEG of at least 4MP by clicking on “Save” at the top of the left sidebar.
Once you have saved your cloud, you can visit Tagxedo’s store and have the cloud printed on a t-shirt, a mug, or some other fun things!
Or just keep the file and do fun things with it yourself like frame it, make it into a card, or cut it out and add it to a 2D or 3D collage (a jar or box).
Onetime and I are going to get ours printed out at the local photo store and then crop it and frame it as a special picture. Maybe in a double frame with a picture of him and Daddy on one side and the cloud on the other? We’ll see!
If you are familiar with using PicMonkey or other photo-editing software, you can always add a special message onto your photo like we did below. I have another tutorial on how to do that in another post if you’d like – click here to read it
That’s it for a unique, personalized word cloud Fathers Day gift for Dad or Grampa! Hope you give this a try and if you have any questions, leave a comment below!
To find even more fun and educational activities as well as positive parenting tips, follow us on Facebook, Twitter, and Google+.
Have fun creating!

How cool! And I love that the kids pick out the words they want to use. Who knows what they’ll come up with and that’s what will make it special 🙂 Thanks for sharing!
Definitely Maggiemaysgifts – that’s what makes it so special! Kids of all ages can do this (as long as they can talk). I would love my son to make one for me…I think I’ll just have to prompt my husband to check our this post after Father’s Day! Thanks for dropping by!