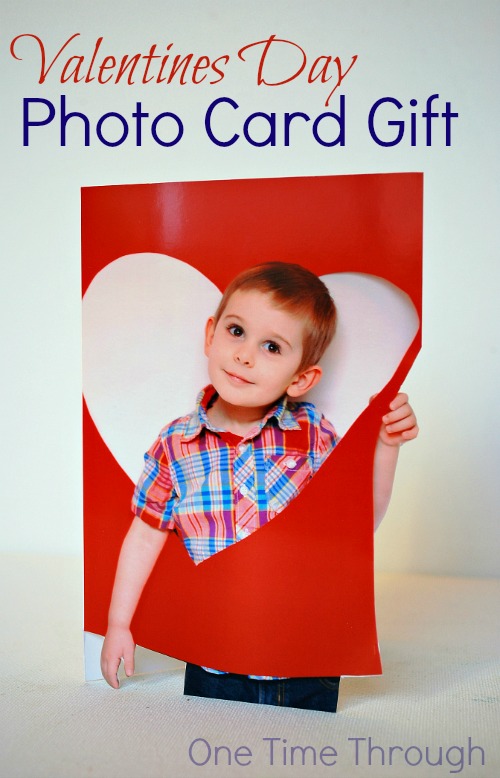
Earlier this week, I showed you how to make an easy printed Giant Valentines Card with your kids as a photo prop for some adorable picture-taking! Today we’ll show you how to transform these photos into an adorable Valentines Day Photo Card – perfect for family and friends!
Oh, and this is an adult craft – because yes – moms (and dads!) like to do art too!
This post contains Amazon Affiliate links for your convenience. Please read our Disclosure here for more details.
Tips for Photo Taking
Once you’ve got your giant Valentines Card props, find a well-lit spot in your house – or outside (if it’s not as freezing cold there as it is in Ontario where we are!)
- Find a spot with as much natural light as possible shining on your child (by a large window, or just inside a doorway). It really doesn’t matter what the background is because that part of the photo will be cut away.
- Dress your child in a shirt with a colour that goes with the colour of your giant card. White shirts tend to wash faces out. Try a solid bright or a pattern with part of the colour of the card like we did with the plaid.
- Point and shoot photos always look better if you don’t use a flash, because the flash tends to flatten out the image and make it look less realistic.
- Ask your child to don the card, or hold the large red heart cutout and take LOTS of pictures! Oh – and try to fill most of the picture with your child and the card so you don’t have to crop too much later.
 Hopefully your child will be interested in doing this for long enough that you get a great photo!
My son Onetime wanted to have a picture of himself that looked like the one on the cover of a favourite Valentine’s story, Happy Valentine’s Day, Curious George![]() .
.

 Making the Valentines Day Photo Card

You Will Need:
-
- 2 pieces of large bristol board for the card prop (one red and one white)
- scissors (I love the EK Success Cutter Bee Precision-Cut Scissors because they’re sharp and small enough to cut out details)

![]()
-
- a stapler to put the giant card together
- plain white paper or red/pink patterned scrapbook paper for cards (I used cardstock) – to make 4 x 6″ or 5 x 7″ cards

![]()
- printed photos in 4 x 6″ or 5 x 7″
- a glue stick
Editing the Photos
To make the giant card prop, read this post.
If you want to write some words on the photo. Try using PicMonkey. It’s a free online photo editor that I use for all my blog’s photos. It’s really easy to use and you can do a lot with it!
Here are the steps to add some simple text to your photos before you print them.
Step: #1:
Go to PicMonkey and click on Edit at the top of the screen. You will be prompted to upload a photo from your computer.
 Step #2:

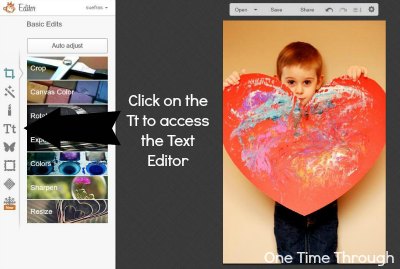
You can edit your photo using all the different tabs on the left side. To add text, click on the Tt.
 Step #3:
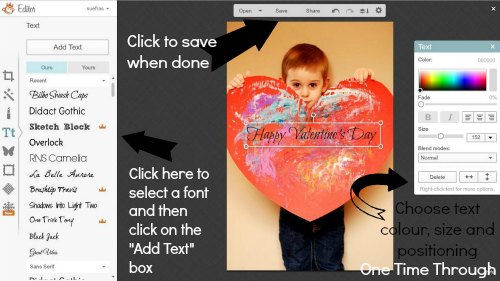
Choose a font style and add it to your photo. You can drag the box of text wherever you like, change it’s colour and size and positioning as well. When you’re happy with how things look – click Save at the top of the screen.
 Step #4:
You then have a chance to choose your resolution. I would go with “Sean” – the best quality for printing. “Pierce” is often good enough for showing online. Save to your computer and print!
 That’s it! There are a lot of other cool things you can do in PicMonkey – take some time to explore and fool around. That’s how I learned to use it!
Putting the Cards Together
Now that the photos are printed, have some fun cutting out the images of your child and gluing them onto cards.
For my photos of Onetime inside the giant card, I cropped the photo so there was only the card and him showing, no background wall. I made sure I cut around his hands and legs to keep them. I also experimented with cutting away the inside white part of the heart as well. In the photo of him holding the heart, I just cut away all the background.
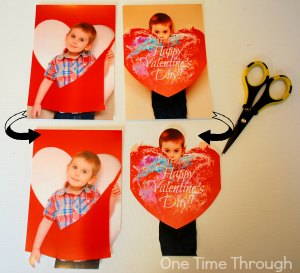
Below are the 3 different versions I came up with – for inspiration!
In the middle card, I kept the photo intact, but cut around Onetime and the red card and glued it onto the front of a plain white card. I trimmed away part of the front cover of the card to make it look like Onetime’s legs were holding up the card. Easy and cute!
In the card on the right, I cut out the white inner part of the heart in the photo, as well as around the outside of the red card and Onetime. I then glued this picture onto the front of a card with a pink cover and polka-dotted interior.
Next, I cut right through the pink front of the card to make it see-through so the dots would show through – leaving a thin pink border.
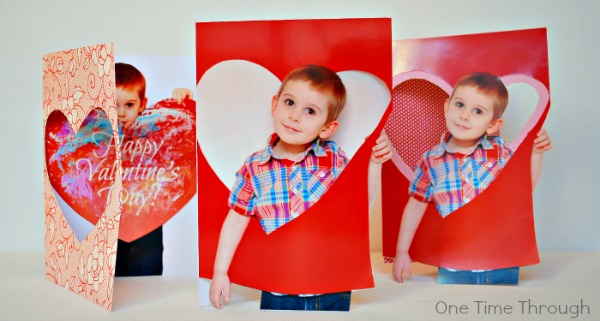 Finally, on the card on the left, I cut away a heart window on the front of a patterned paper card a little smaller than the heart in my photo.
On the inside, I glued my son’s picture so the heart (with the message!) would be showing through the window, but would be a surprise when opened! (Unless all my family and friends read this post of course…!)
 That’s it for the Valentines Photo Card Gift activity. I hope you give this a try and make some adorable photo cards too. I’m super happy with how ours turned out!
For more ideas, follow my Valentine’s Day pinterest page at: Follow One Time Through’s board Valentines Day with Kids on Pinterest.
To adult crafts that feature our adorable kids!


love it!! Can’t wait to try it with my LO 🙂 thanks for the great idea!
Thanks so much Amanda! Hope you get some cutey pictures! I’m going to be scrapbooking these ones for sure. Thanks for dropping in! Sue