As a participant in the A-Z STEM Blogging Series this month – we decided to do Y is for YEAST!
Check out our 3 hands-on yeast experiments today, grab a few supplies from the store, and make your own pizza from scratch with the kiddos for dinner tonight! Science doesn’t get tastier than this!
This post has Amazon Affiliate links for your convenience. For details see Disclosure.
Yeast Growing Supplies
To join in on our yeasty fun – you will need:
- 3 packets of yeast (or a jar)
- 2 1/2 cups of flour
- 1/2 tsp salt
- pizza sauce
- mozarella cheese
- pizza toppings of your choice
- a couple teaspoons of sugar
- a balloon
- a small funnel
- thermometer (a meat thermometer worked well for us) – not necessary, but helpful!
- magnifying glass (optional)
Yeasty Inspiration
Before we started our experiments, I decided to read Onetime, my 3 year old son, the wonderful Curious George and the Pizza Party![]() story by Margret & H.A. Rey.
story by Margret & H.A. Rey.
 I love all the Curious George books, but this one is a classic! Basically George gets invited to a pizza party at a friend’s house and then he ends up getting into the dough and making a mess (of course!). Along the way, he discovers that you can cut out and shape pizza dough to make creative and tasty creations.
After reading the story, Onetime was psyched to make his own pizza dough from scratch and to do a little investigating along the way.
Investigating the Yeast
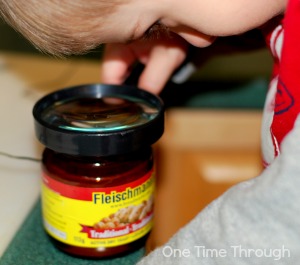
To begin, we opened up our jar of yeast and just examined it with a magnifying glass. We talked about how yeast is a living fungus like mushrooms and that it needs food and water to grow and the right temperature.
Parent Science Tip: The yeast you buy in a store is currently inactive but with the right conditions, it will activate and start to eat and grow! To find out more about yeast and how it grows and helps bread to rise, read this post at wiseGEEK.
 Yeasty Experiment #1: Finding Conditions for Growth
To find the right temperature for growth, we filled one measuring cup with 1/4 cup of cold water and 1 tsp sugar for food. Then we added one packet of yeast (or follow the instructions on the jar for one packet).
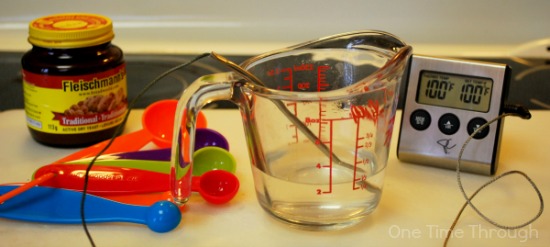 Into a second cup we put 1/4 cup warm water (we measured it with a meat thermometer to get it as close to 100º F that we could), 1 tsp sugar and then a packet of yeast.
Then we compared the two cups. Our cold water cup looked like below – the yeast got kind of mushy, but nothing really happened.
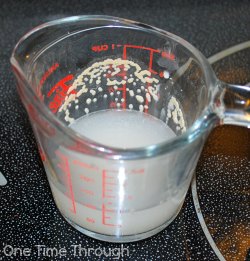 In our second cup with the warm water – magic happened!
 We had found the right conditions for the yeast to grow! It had food (sugar), water, and the right temperature. Within 10 minutes, the yeast had about doubled in size! Cool!
Parent Science Tip: This yeast is now ready for pizza making. By the way – the bubbles are caused by a release of carbon dioxide gas as the yeast activates and eats the sugar.
If you do not see a reaction with the warm water and sugar, your yeast is likely dead. You will need to get yourself another jar or packet. Bummer!
Yeasty Experiment #2: Pizza Making
Now that the yeast has grown (after sitting for 10 minutes), it’s ready to be made into dough. Add the yeasty mixture to 2 1/2 cups flour, 1/2 cup water, and 1/2 tsp salt. Knead the dough until it is smooth and almost shiny.
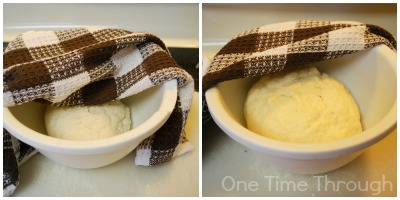
Then you need to put it in a bowl and cover it up with a cloth or piece of plastic in a warm place (on the counter is fine). After about 40 minutes to an hour, the dough will rise to about double its size and be ready for pizza-making.
 This is when my son and I really had fun and where Curious George’s story gave us some inspiration. We took the dough and with the heel of our hands and a rolling pin, we battered it into a thin, flat blob.
Onetime decided he wanted a stop sign shaped pizza and I wanted a heart shaped one. We just cut the dough out with a knife.
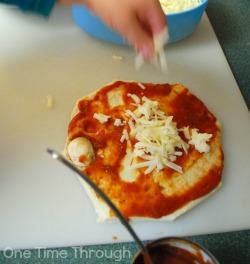
Then we added our pizza sauce, cheese, and toppings and popped into the oven at 425º for about 10 minutes until the edges of the crust were brown.
 Onetime was interested in seeing how much the dough puffed up while being cooked. The good part about this dough, was although it puffed up, it still kept its shape quite well. It was also pretty tasty!
The reason the dough puffs up is because the temperature of the oven gets the yeast eating! It eats and eats the sugars in the dough while producing carbon dioxide bubbles which puff up the dough.
After a few minutes though, the heat kills the yeast and the dough stops puffing up…oh the sacrifice! A yummy one though!
 Yeasty Experiment #3: Watching Yeast Eat

Although this experiment is 3rd in order, it’s a good one to do while you’re waiting for your dough to rise.
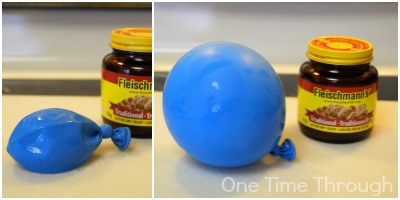
Basically, you will be repeating experiment #1, but inside a balloon! Using a funnel, pour 1/4 cup warm water (measured to be 100ºF) and 1 tsp sugar inside a balloon. Add a packet of yeast and tie off the balloon.
You can get your kiddo to shake up the balloon now and sit it down to watch what happens. If you did experiment #1, ask your kiddo what they think will happen.
If the conditions are right, your yeast should start eating and producing carbon dioxide. Within a few minutes, you will see your balloon puff up from the gases.
To be honest, we had to try this a few times to get the balloon to puff up as much as we did. I think it was about getting the temperature just right. But when it worked, it was really cool!
 That’s it for our Yummy Yeast Experiments! To find even more fun and educational activities as well as positive parenting tips, follow us on Facebook.
You can find more fun Science ideas for kids on our Pinterest board: Follow One Time Through’s board Science Activities for Kids on Pinterest.

To some yummy yeasty experimenting!

Love these fun experiments incorporating science and food for kids!
I know you’re a huge foodie scientist too. Loved that Thanksgiving food science post you did over at Left Brain Craft Brain.com. Thanks for dropping by Anne!
I have yeast in my cupboard that I never use so these ideas are perfect!