Looking for an amazing Father’s Day gift that your child can make for Dad or Grandpa? How about a gift that can be as personalized as the man who deserves it?
Try helping your kiddo make a personalized plaque sculpture. It looks terrific and is lots of fun for little ones to design!
This post includes Amazon Affiliate links. Please see Disclosure for more details.
Materials:
- Play Dough
- Plaster of Paris Powder for Crafts
- A small Utility bucket or container for mixing plaster
- A paint stick to stir plaster
- Protective Gloves
- A plastic container to make the mold (we used Plant trays)
- A variety of objects that represent Dad or Grandpa’s interests
- A dry cloth or old toothbrush
- Watercolor Paint, Set of 24 Vibrant Colors in Tubes
- A large paintbrush
- Mod Podge (Gloss Finish) (optional)
How to Make the Plaque
Step #1: Go on a hunt!
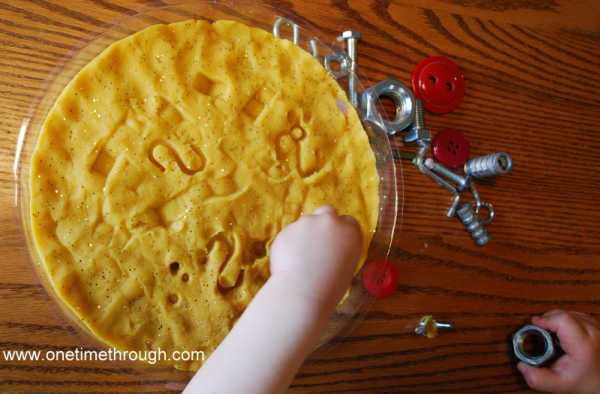
This is REALLY fun! Have your child collect a variety of objects that represent Dad or Grandpa.
These could be nuts and bolts for a “handy” guy, or play food and utensils for that Dad who likes to cook. You could even take imprints of a remote control for that Dad who likes to relax in front of the TV!
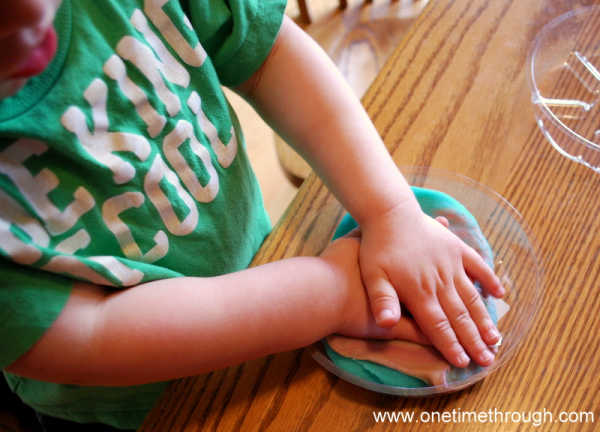
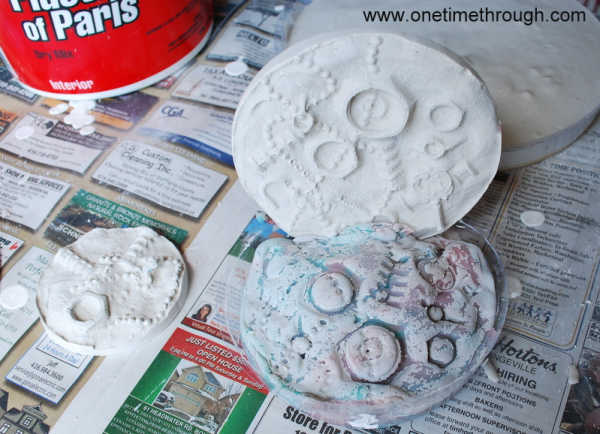
Step #2: Create the mold
Have your child press playdough into the bottom of the plastic container. You want the playdough to be at least 1″ thick. Flatten and smooth it as much as possible because this will be the top of your plaque!
Step #3: Make an impression
Show your child how to make impressions in the playdough using the objects you found.
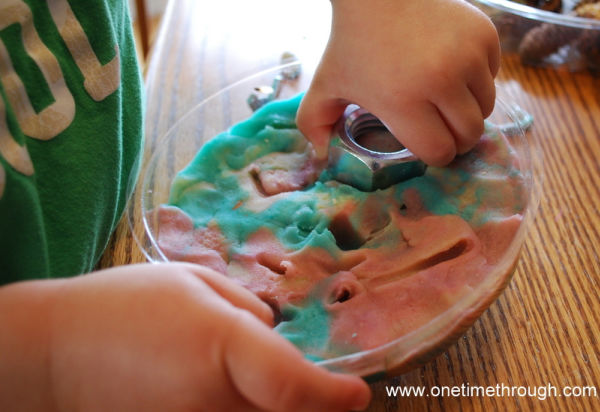
Encourage your child to cover most of the surface of the plaque with imprints. Help them to not press all the way through the playdough, but approximately 3/4 of the depth of the playdough.
Step #4: Pour the plaster
Prepare the plaster or cement according to the directions on the package. Pay close attention to the safety precautions if you are using Plaster of Paris. You cannot put your skin into direct contact with it.
Pour the plaster/cement mixture into the container, on top of the playdough, until the plaster is at least 3/4 – 1″ thick. Allow it to dry overnight.

I would strongly recommend that you – the parent – do this part without your children around. I chose to work in the garage after my son was asleep, so that I could focus on not making a mess and being safe when mixing and pouring the plaster.
Step #5: Remove the playdough
It’s time for the big reveal! If you want your child to participate in removing the playdough mold to get the first glimpse of the sculpture, I would recommend they wear gloves of some kind (and yourself too).
Because the playdough is damp, the top of the sculpture as you peel it away will be a little damp too, and you don’t want to get the wet plaster on your skin – it can be an irritant until it is dry.
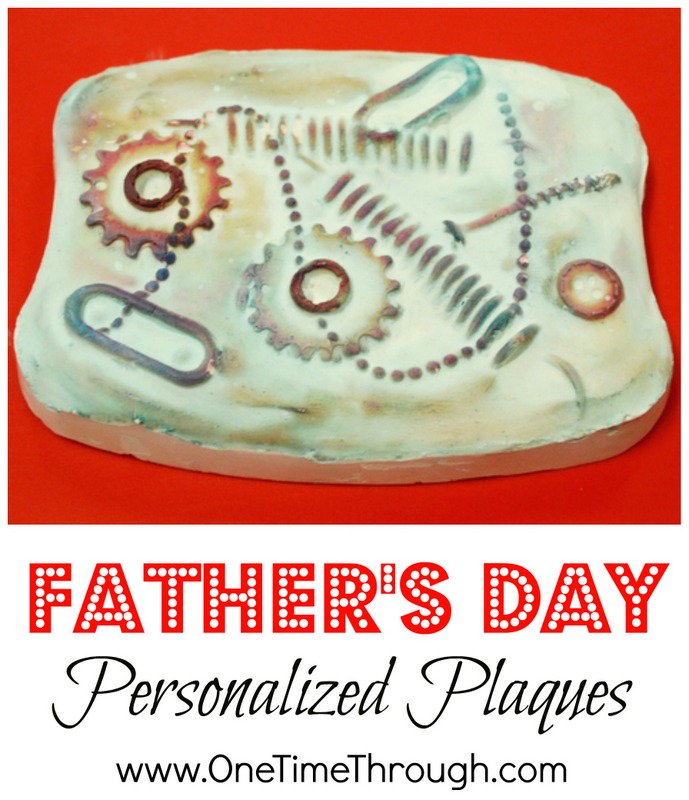
Step #6: Decorate it!
Once the sculpture is completely dry, brush it off gently with a dry cloth or an old toothbrush. Now it is ready to decorate and paint!
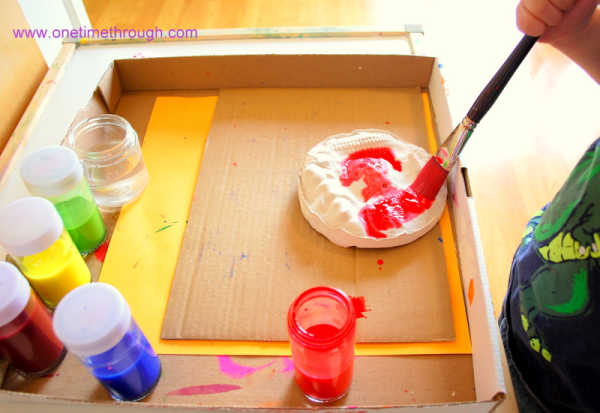
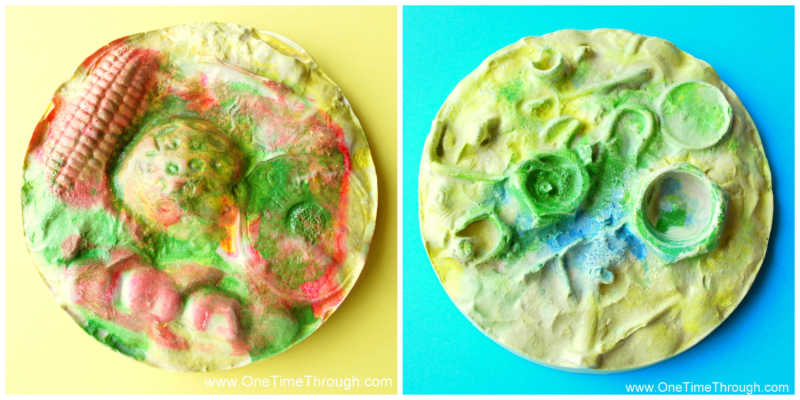
There are lots of different ways you can paint the sculpture:
1. Watercolours:
Using watercolours or watered-down acrylic paint, cover the entire surface one colour (we used light blue) and then use a different colour to paint over the raised parts of the sculpture (we used purplish red).
To make watercolours more kid-friendly, I squirted a bit of tube-watercolour paint into small glass containers, added water and then shook them up! Voila – watercolours ready to go! (Thanks to my artist friend, Jen at 4MonkeysStudio for that idea!) If you use water-tight lids, you can keep these paints to use over and over!

2. Freestyle!
Have your child paint the sculpture however they wish! (this was Onetime’s favourite method!)
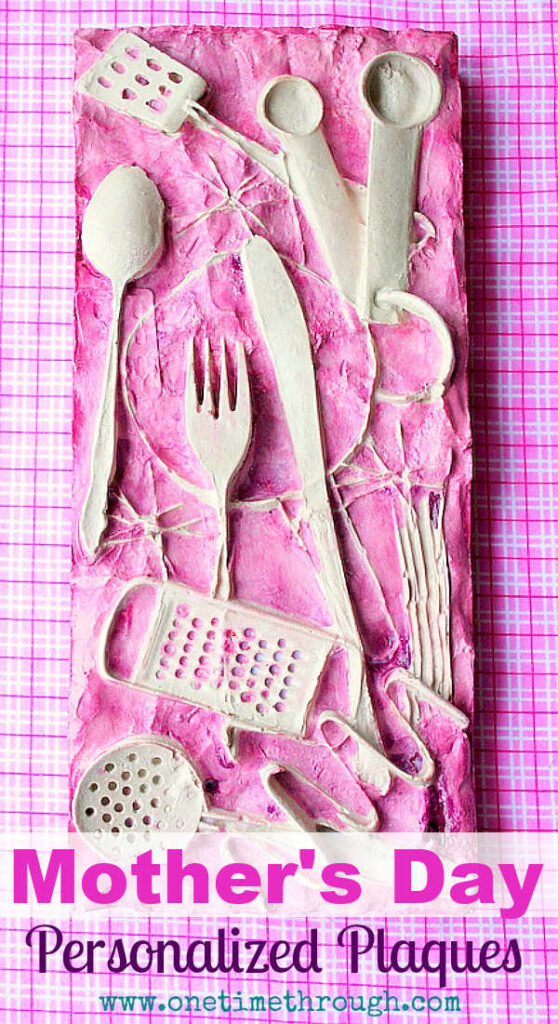
3. Highlighting
Paint the backdrop of the plaque with a colour (or 2!) and leave the raised images white. We didn’t do any of the Father’s Day plaques like this, but here’ s a picture of one we did for Mother’s Day using this technique.
Step #7: Protect it
Seal the art with spray varnish or craft podgy! Glossy looks awesome!
Oh – and you can always write a personal message on the back of the plaque using permanent marker. Wrap up the gift with a Display Stand so Dad or Grandpa can display his unique gift!
Happy Sculpting!
