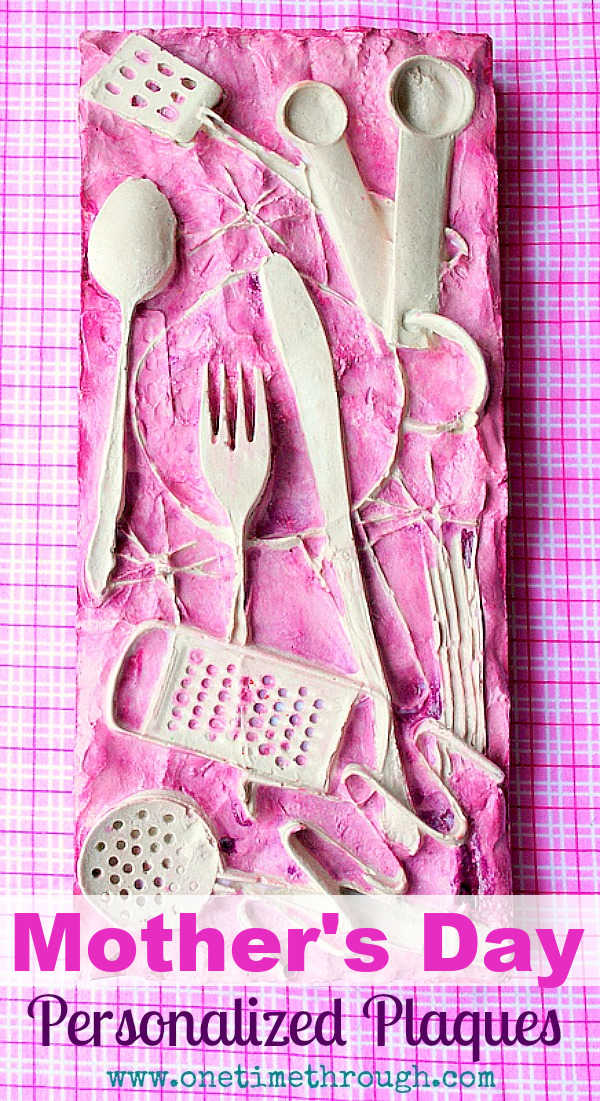
Looking for a fun, and meaningful Mother’s Day gift for Mom or Grandma that you can make with your child? All you need to do is collect some objects from around the house that symbolize Grandma or Mom’s interests and follow these steps to make a unique and personalized sculpture gift! It looks terrific and is lots of fun for little ones to design!
This post includes Amazon Affiliate links. Please see Disclosure for more details.
Materials:
- Play Dough
- Plaster of Paris Powder for Crafts
- A small Utility bucket or container for mixing plaster
- A paint stick to stir plaster
- Protective Gloves
- A plastic container to make the mold (we used Plant trays)
- A variety of objects that represent Mom or Grandma’s interests
- A dry cloth or old toothbrush
- Watercolor Paint, Set of 24 Vibrant Colors in Tubes
- A large paintbrush
- Mod Podge (Gloss Finish) (optional)
How to Make the Personalized Sculpture
Step 1: Gathering Items
To get started – explain to your kiddo that you’re going to make Mom or Grandma a gift and need to collect some things around the house that represent her.
Go on a hunt! This part is really fun!
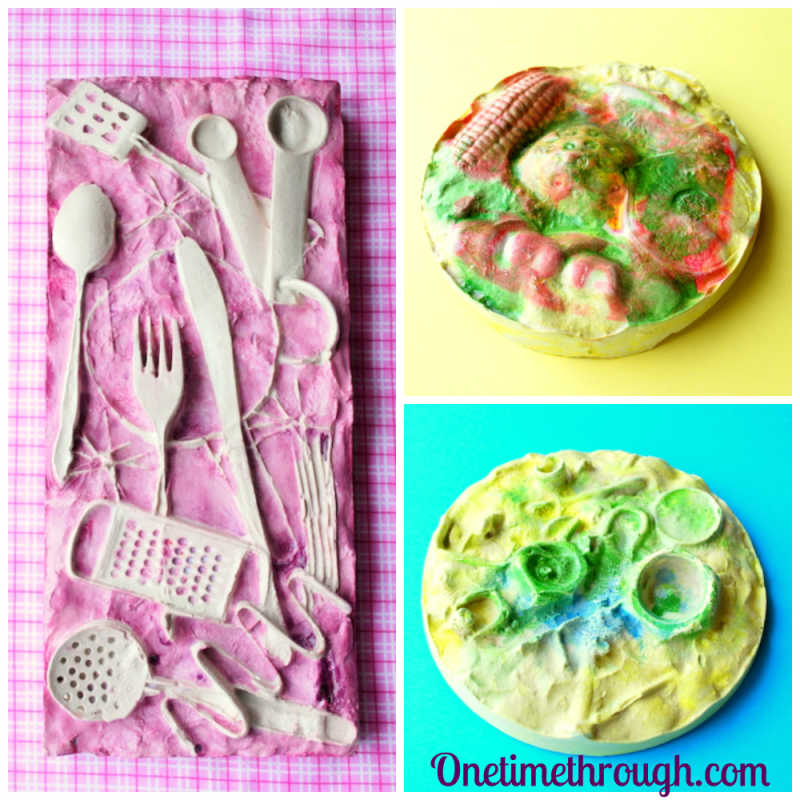
For example, to make his Oma’s sculpture, my son and I raided the kitchen! Oma is a terrific cook who regularly stocks our freezer with delicious homemade dinners – so we went with a utensil theme! Here’s what we collected.
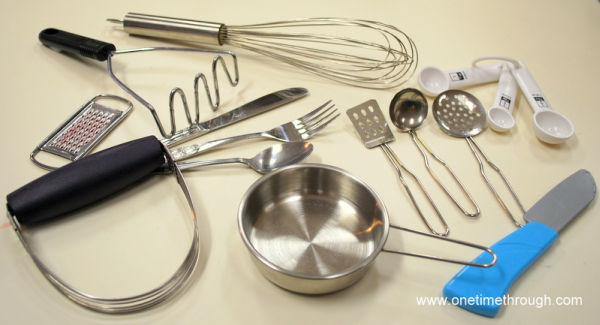
We actually ended up using some of Onetime’s play-kitchen utensils too because they were nice and small!
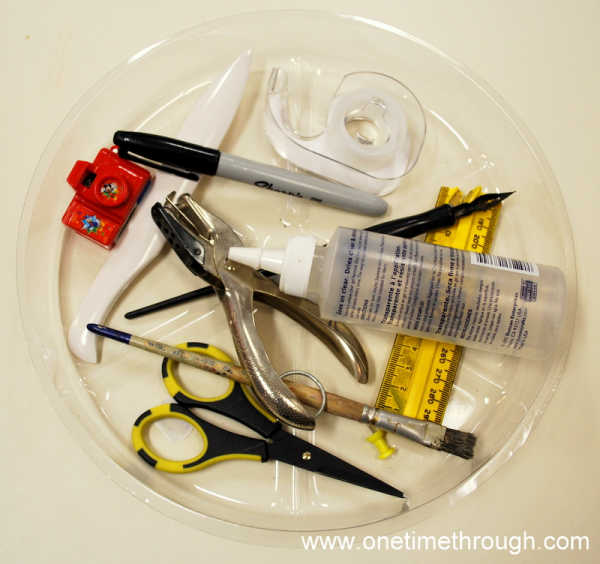
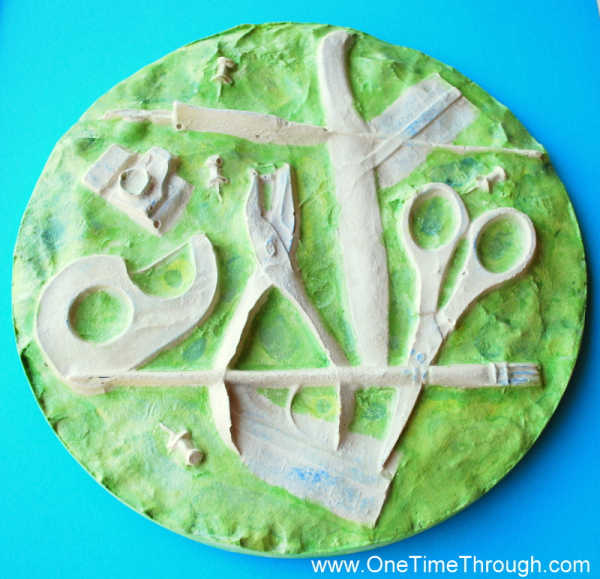
To make his Nan’s sculpture, my son and I looked for crafty items that would make interesting prints. Nan is an amazing calligrapher and an avid scrapbooker – so we found lots of crafty tools to use!
Step 2: Create the Mold
Once we had gathered all the items to symbolize the grandmas – we decided what containers we were going to use for the shape of each Grandma’s art.
We chose a circular plastic plant drip catcher for Nan and a rectangular cardboard box for Oma. Then we laid the items inside each to make sure they would fit well.
Next, Onetime pressed playdough into the bottom of each container to make the mold. This homemade playdough was leftover from our Treasure Playdough activity. Find my awesome homemade recipe here if you need to make some.
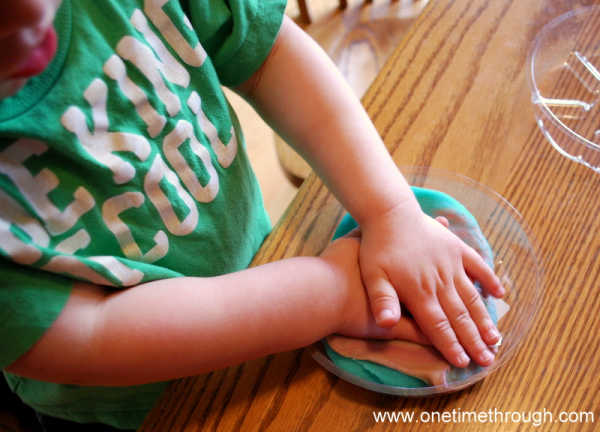
Make sure the playdough is pressed evenly throughout the container to about 1″ thick. Also, smooth out the surface with your fingers before continuing.
Step 3: Create the Impressions
Now it’s time to make imprints of all those collected objects! Besides making a plaque for his grandmothers, Onetime also wanted to make one up for Daddy with nuts and bolts!
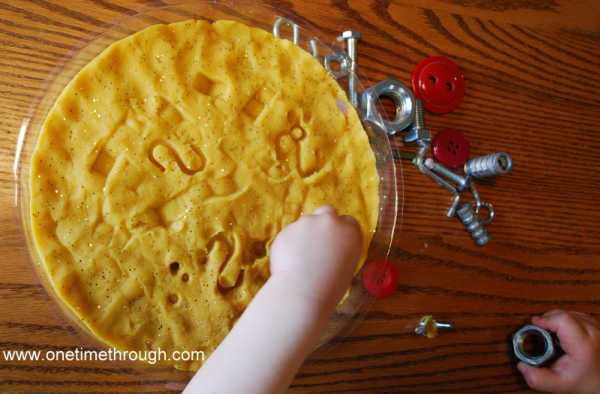
My son LOVED this part! At first I had to show him how we were pressing the objects in about 3/4″ to get their imprint, then taking them out again. Soon, he got the idea and continued independently.
Step 4: Pouring the Sculpture
Once the playdough is completely imprinted and designed – it’s time to pour in the Plaster of Paris or craft cement/plaster.
*Safety Note: If you decide to go with the classic Plaster of Paris – please read the instructions carefully – there are some safety precautions you need to take, and you will need to do this part without your children around. Alternately, if you order the plaster I linked to above, it is non-toxic and child friendly.
Pour the wet plaster/cement onto the top of your playdough mold until it is at least 3/4″ thick. Let it dry overnight.

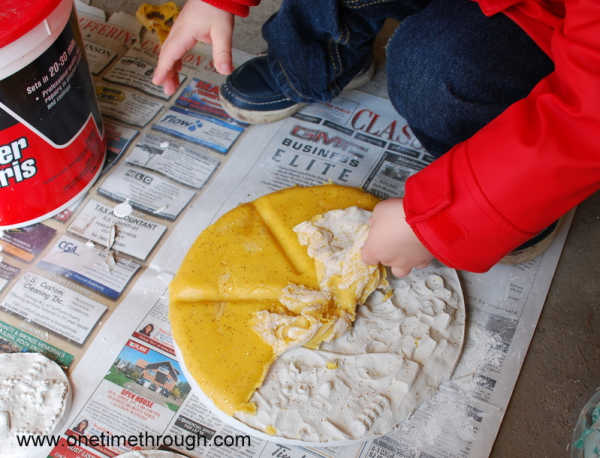
Step 5: The Big Reveal!
It’s time for the big reveal! If you want your child to participate in removing the playdough mold to get the first glimpse of the sculpture, I would recommend they wear gloves of some kind (and yourself too).
Because the playdough is damp, the top of the plaque as you peel it away will be a little damp too, and you don’t want to get the wet plaster on your skin – it can be an irritant until it is dry.
Once the plaques are completely dry, brush them off gently with a dry cloth or an old toothbrush.
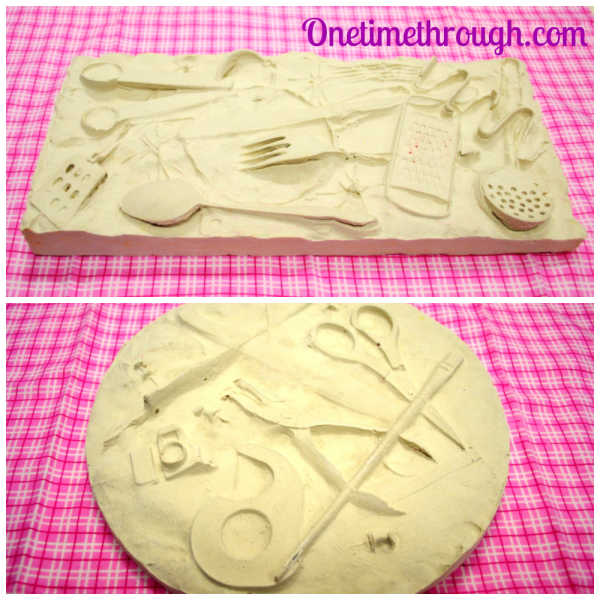
Step 6: Painting the Sculpture
Now they are ready to paint! Here are our two plaques before painting…
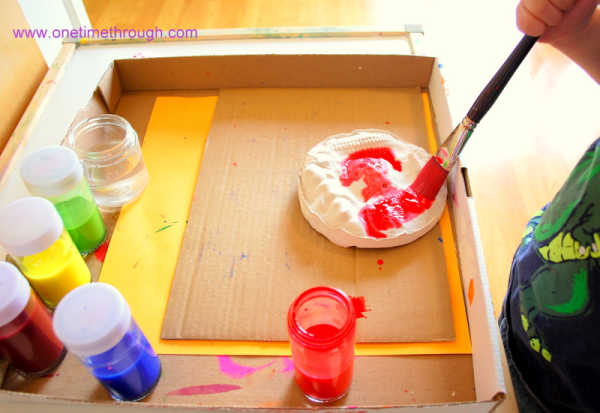
There are lots of different ways you can paint the sculpture. We used watercolours.
I squirted a bit of the watercolour paint into small glass containers, added water and then shook them up! Voila – watercolours ready to go! If you use water-tight lids, you can keep these paints to use over and over!
You could also use acrylic paints, or no paint at all!
Experiment with different ways to paint the sculptures. Your could try using many colours, or just sticking with one.
We also painted some of them just on the spaces around the imprints – which creates a totally different look.
When the paint is dry, cover the entire surface of the plaque with a glossy sealer like Mod Podge.
Step 7: Presenting the Gift
To present your gift, you can wrap a simple Display Stand along with the plaque to help it stand. We used one like this. Then you could wrap your gift in pretty coloured tissue paper and tie with a lovely ribbon or raffia!
Although this project takes some time to make, my son really enjoyed designing and painting the plaques. I think they look terrific and our grandmas loved their personalized sculpture gifts this year along with the love letters that we did earlier this week!
Happy sculpting!

To find even more fun and educational activities as well as positive parenting tips, follow me on Facebook, and Pinterest.
This is the coolest thing!!! What a great idea! A really interesting process for kids and a meaningful gift – genius!
Thanks so much Ann!
So neat!
Thanks for stopping by Meg!