Learn how to make a light-up paper circuit thaumatrope project. It’s a simple STEAM project with big bang value!
It also incorporates science, technology and creative design and is tons of fun to play with!

This post contains affiliate links. Please see my disclosure for more details.
What is a Thaumatrope?
A thaumatrope is an old fashioned toy that takes advantage of the human eye’s inability to process as quickly as the hand can make something turn.
Basically, when you flip back and forth quickly between two pictures, the human eye overlaps the images to see them as one. When you spin a thaumatrope, which has two different pictures on either side, the eye merges the images together into one!
Materials You Will Need
- Print out a copy of my Thaumatrope Template
- Tape
- A Straw
- Pencil crayons or markers
How to Make a Simple Thaumatrope
If thaumatropes are new to you, try making this simple paper one before you move on to tackle the circuit project.
Step 1: Cut Out the Template
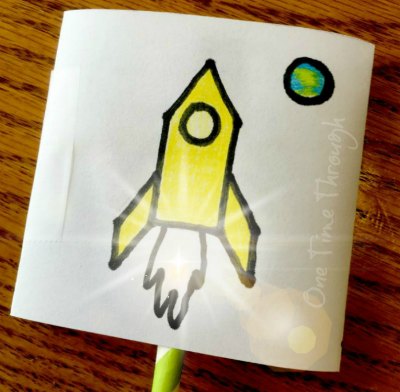
Cut out the 2 large rectangles on the thaumatrope template. The top one is designed for you already. The bottom blank one is there if your child wants to design their own like mine did!
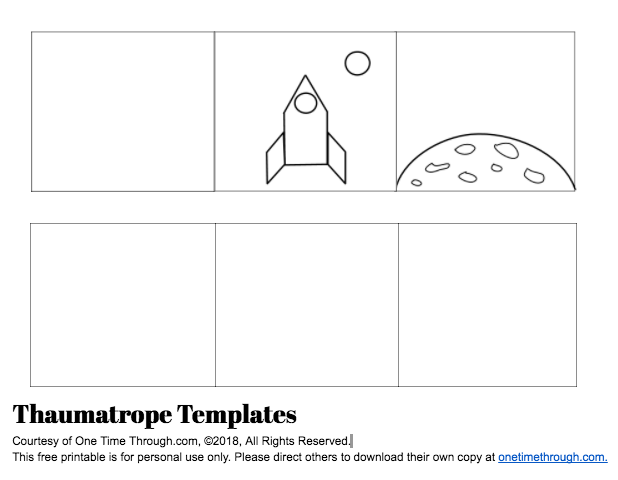
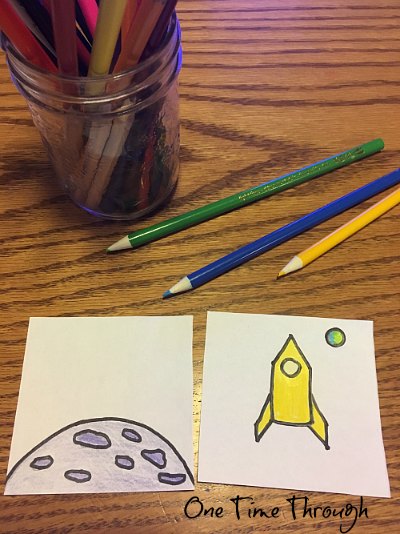
Step 2: Colour
Have your child colour in the rocket and moonscapes. They can add any other details they like keeping in mind that the two pictures will overlap when the toy is spun.
Note: If your child wants to make their own thaumatrope design, have them draw two pictures in two respective squares making sure that the pictures don’t overlap when the squares are put back to back.
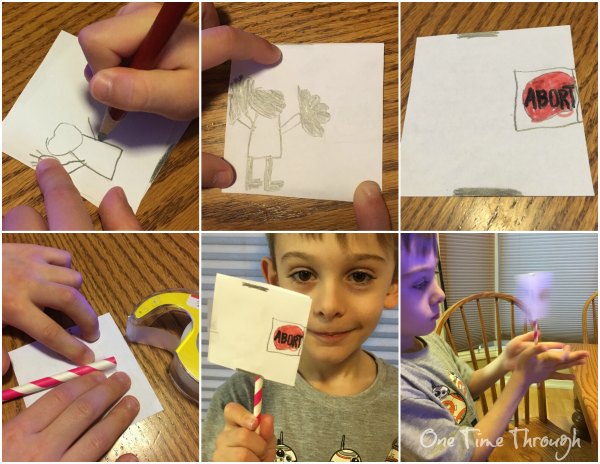
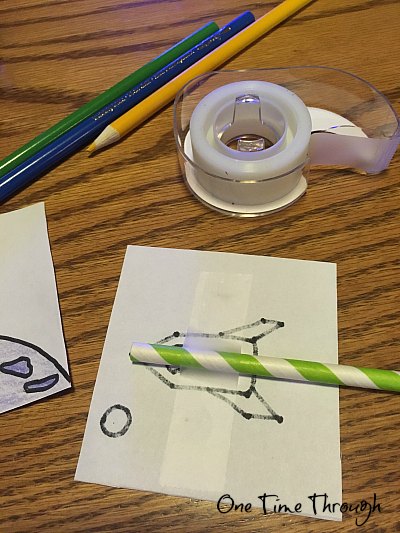
Step 3: Add a Handle
Tape a straw securely to the backside of the rocket ship square.
Step 4: Secure the Thaumatrope Together
Fold the other two squares in so that the pictures show on each side and tape securely at edges.
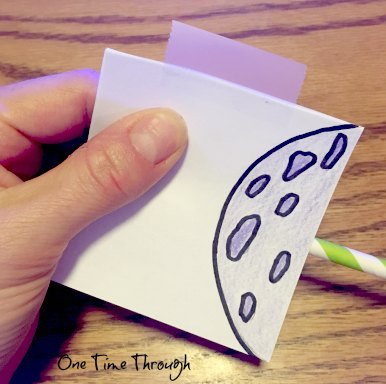
Step 5: Play!
Spin the straw back and forth between your hands to make the pictures blend together!
Light Up Your Thaumatrope!
By adding a simple circuit to the inside of your thaumatrope, you can make an extra special toy or gift that lights up as it’s spinning! Fun!
Materials for the Light-Up Thaumatrope
- Copper Foil Tape
 or Aluminum Foil Tape
 - A CR2032 coin cell battery (CR2032 Lithium Battery 3V )
- A Small Binder Clip
- An LED light (I purchased this multi-kit for school – LED Light Assorted) or a Chibitronics circuit sticker LED light (We used these: Chibitronics Circuit Stickers – Red, Yellow, Blue Megapack)
- Alternately: Grab the pack below from Chibitronics – it includes copper tape, binder clips, batteries and LED circuit sticker lights, along with a fabulous book that will walk your child through how to make simple circuits, parallel circuits, a switch, etc. This was my son’s favourite Christmas present this year!

How to Make a Light Up Paper Circuit Thaumatrope
Check out this video tutorial OR read the detailed instructions below!
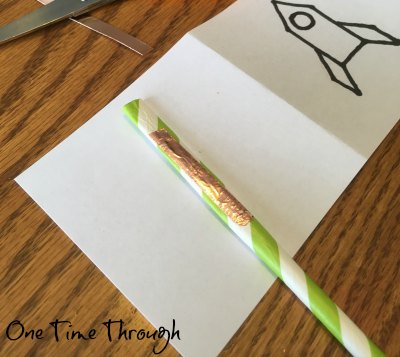
Step 1: Add Conductive Tape
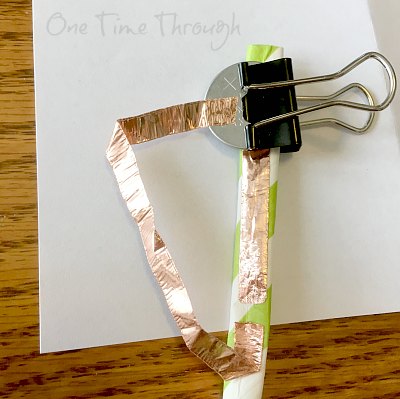
Start by placing approximately 1 inch (3 cm) long piece of copper tape on the end of a straw.
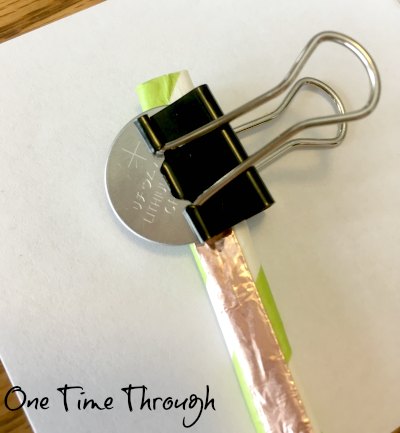
Step 2: Add Battery Power
Next, add a battery to the top of the straw so that the positive side is facing up and the bottom is overlapping the copper tape. Hold it in place with a binder clip.
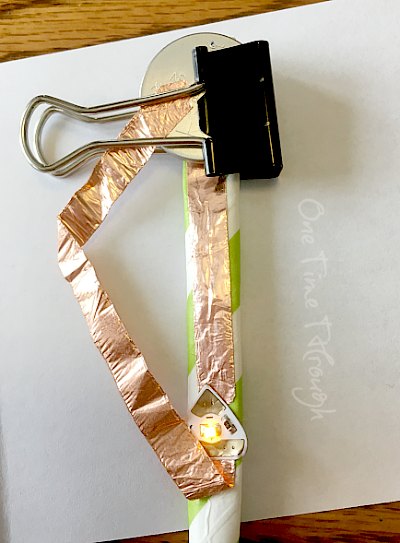
Step 3: Add More Wires
Now, leaving a gap at the bottom of the first piece of tape (about 1cm), add a second piece of tape that will complete the loop back to the top of the battery.
Step 4: Put on the Lights!
To finish the circuit, add an LED to the gap.
If you are using a regular LED, make sure to attach the negative end to the first piece of tape and the positive end to the longer second piece.
If you are using a Chibitronics LED circuit sticker, stick it on top of the tape with the pointed part (negative end) facing up.
Step 5: Secure the Thaumatrope Together
Now flip your circuit upside down on top of the back of the picture part you want to light up (our rocket thrusters if you’re using my template). Tape the straw and circuit to make it secure.
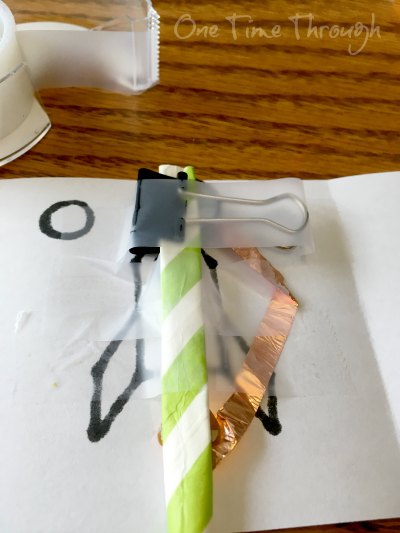
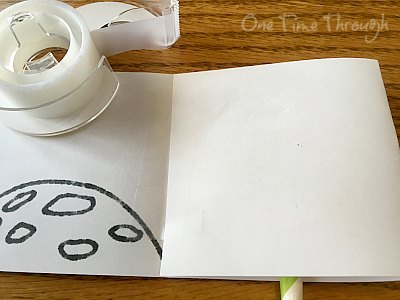
Now fold the blank square of the template over the circuit so that the light doesn’t shine through to the other side of the thaumatrope. Then fold the other picture square over and tape securely.
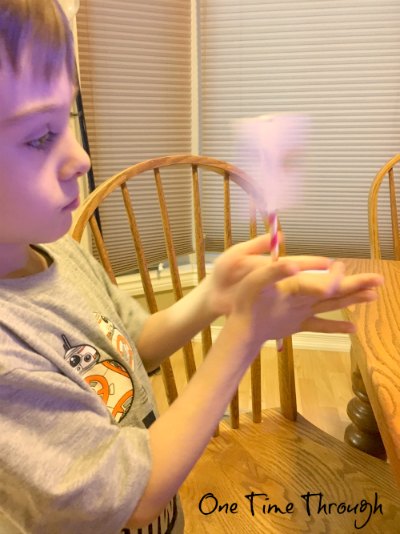
Step 6: Play!
Spin and glow! Watch the rocket take off from the moon!
Favourite Books About Electricity for Kids
If you’ve read any of my posts, you know that I’m a picture book nut and that generally, whatever activities I’m doing at home with my son, we’re also reading something that has to do with it.
Onetime has been crazy interested in electricity for years now. The Magic School Bus and the Electric Field Trip was the book that sparked his interest.
It’s a fun read, full of facts that will get your child thinking about what electricity is, how it’s made, and why it’s important! Best for 4 to 9 year olds.

![]() The Eyewitness book series are a favourite in my school library because they are full of facts, photographs, diagrams, and true stories. Check out this electricity one! Best for kids 8+.
The Eyewitness book series are a favourite in my school library because they are full of facts, photographs, diagrams, and true stories. Check out this electricity one! Best for kids 8+.

Great Starter Kits for Young Electricians
If you’re looking for other hands-on ways for your kids to learn about electricity, you might want to check out my favourites.
The Snap Circuit kits are amazing! There are lots of different kits at different price points, but if your child is really interested in electronics, try this kit below. It’s got all the main electronic pieces to learn about circuits, resistors, power sources, switches and more!

![]() If you’re looking for a more tactile electronics experience, check out this squishy circuit kit from Klutz. It comes with conductive doughs, wires and LEDS to make moldable creations that light up!
If you’re looking for a more tactile electronics experience, check out this squishy circuit kit from Klutz. It comes with conductive doughs, wires and LEDS to make moldable creations that light up!

You may also like…
Follow me on Facebook and Twitter!
Today’s post is a part of a fun STEAM series going on this month hosted by Left Brain Craft Brain. Be sure to drop by her blog to learn more about this awesome 28 day series full of fun activities for kids to try at home or at school!
Happy spinning!
