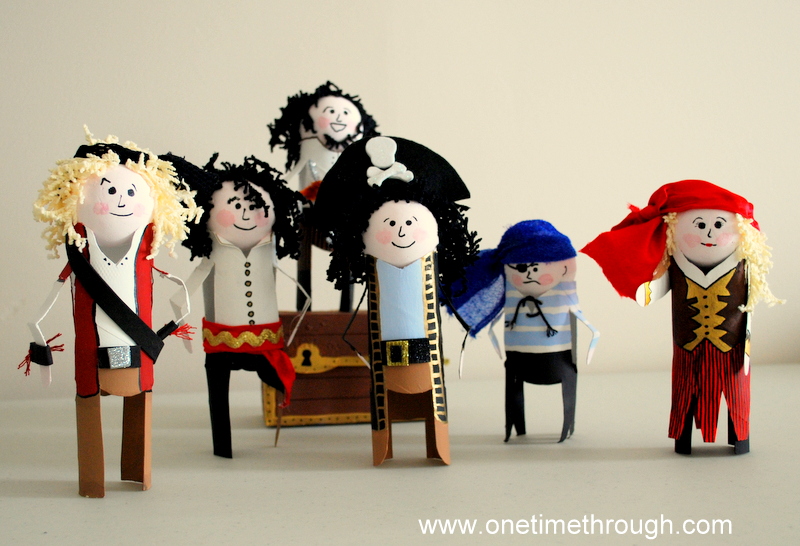
AHOY Landlubbers! Check out the instructions below for these easy to make – and super-fun – paper roll pirate dolls!
Your kiddo will love making and decorating his/her own little pirate, or whatever other kind of person. Think: princess, super-hero, ballet dancer, construction worker, or even a miniature of themselves or family members!

You will need:
- glue gun
- toilet paper tubes
- small styrofoam balls
- paint or markers (acrylic paints work best and paint markers are great for details!)
- fuzzy yarn in a colour that looks like hair
Optional: sparkly fun foam, pipe cleaners, material, felt, sequins etc. for decorating
Make Your Own Paper Roll Pirate Dolls
Step #1: Make the Body
At one end of the tube, cut out legs. On each side of the tube, cut out an arm and give it a bend for the elbow. The arms are a bit tricky to get right. Make sure to use sharp scissors to get started, and have the hand drop down below the crotch (did I really say that?)
If your kiddo wants to make a hook hand, cut out the arms with a rounded hand, then after the arm is cut out – cut out the hook.
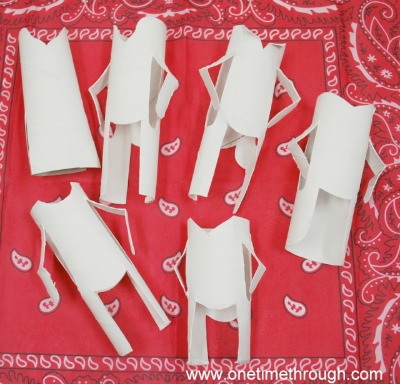
Step #2: Prepare the Neck
At the head end of the tube, cut out a collar or neckline. Think V-neck, scallops, scoops and shirt collars.
Step #3: Paint the Body
Paint the tube white to prepare for decorating. Acrylic paint works great as a base.
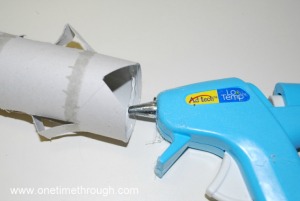
Step #4: Attach the Head
Using a glue gun, put glue on inside of “collar” and stick in the styrofoam ball. Children as young as 7-8 can learn to use glue guns safely, but I would still strongly recommend you stay with them the whole time they are using this tool!
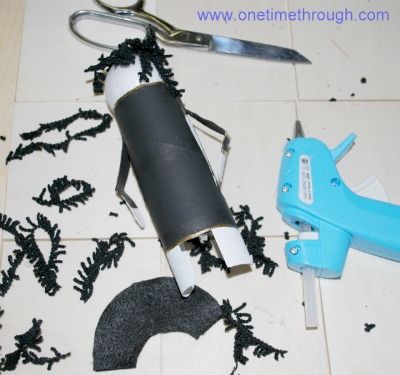
Step #5: Add Some Hair
Glue on small pieces of yarn for hair. When glueing on hair, a glue gun works best. Work in small sections and glue the yarn on in little “U” loops to make it look more realistic.
This part is best done by an adult, but if you use longer pieces of yarn, your kiddo can give the doll a haircut to make it look just the way he or she wants. So much fun! Add a hat, or scarf too.
Step #6: Decorate Away!
Let your child decorate the miniature person however they like! Older kids may want to paint on clothes, or glue on clothes made out of scrap materials. Younger children can decorate their people with markers. I used pictures of pirates from the internet as inspiration for clothing!
Step 7: Make a Face
Add the face with permanent marker. Keep it simple, and add expression with the eyebrows and mouths! Have your child practise on paper first so they’re confident they’ll like what they do!
My son absolutely LOVES these dolls – and not because they’re all dressed up. When I first made a few little people with just arms, legs, and heads – he enjoyed playing around with them for a while – creating little conversations between them!
This says a lot, because my son, has never been interested in dolls at all, regardless of us trying to be gender neutral with our toy-buying! They are just so cute – with their huge heads and bendable arms!
Last notes: Obviously, I did the decorating on the dolls in the picture, because I wanted to show you different things that could be done with older children. But kids as young as 2 can enjoy decorating their own doll if you’re willing to help prep some of the trickier parts for them. So many possibilities! A great creative craft for a rainy day!
Hope you give it a try and have fun!
To find even more fun and educational activities as well as positive parenting tips, follow us on Facebook, and Twitter.
“Til Later Mateys!

For other piratical fun – check out our Pirate Art and Activities board on Pinterest!
Follow One Time Through’s board Pirate Art and Activities on Pinterest.