Welcome to my Fire Fighter Birthday Party blog series! My son, Onetime, recently celebrated his 3rd birthday and I am sharing all the fun details with you!
First, I showed you how to make a cardboard firetruck for pretend play and how to set up some amazing hands-on firefighting play centers.
Today, I am sharing our fiery arts and crafts party activities!
*This post contains Amazon Affiliates Links. Please see our full Disclosure Policy here.
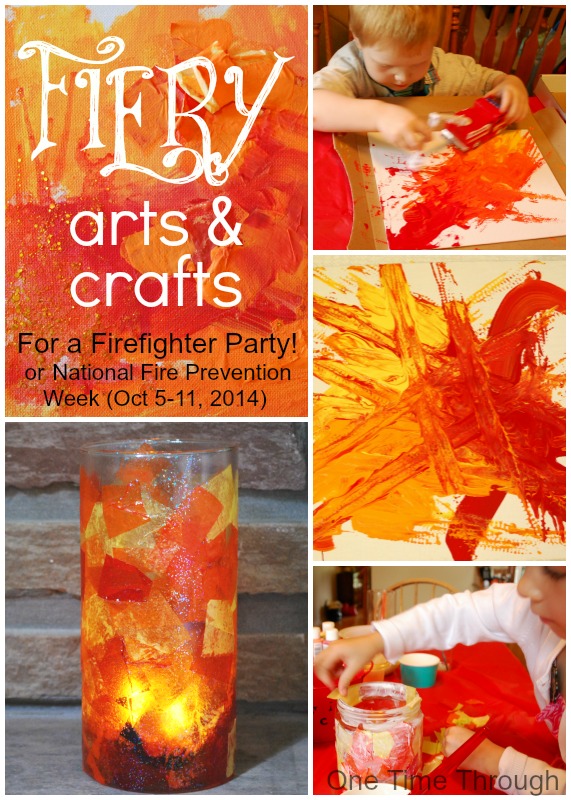
The guests at our Firefighting party ranged from 1 1/2 to 6 years old, so I wanted to have a couple of different art/craft projects that would appeal to all the kids. I decided to have an open-ended firetruck painting project, and a fiery tissue paper lantern craft.
Some of the kids did only one project, and some chose to do both. In all cases, they surprised me with their creativity and everyone went home happy with a special artsy memento from the party!
Open-Ended Firetruck Painting
You will need:
– red, orange, and yellow acrylic paint
– red and gold glitter paints
– paintbrushes and water jars
– a canvas for each child
– a few toy firetrucks
– red, orange and yellow tissue paper cut into squares
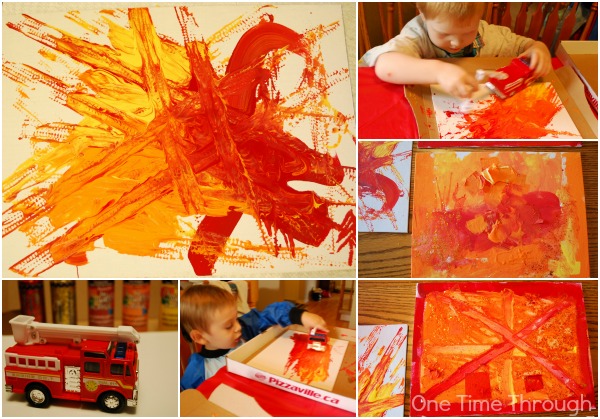
Depending on the children’s ages I explained the project differently. For the younger kids, I squirted a few blobs of each of the colours of paint on their canvas, gave them a firetruck, and told them to paint with it!
After the driving was done, I squirted some glitter paint on and they repeated (see top left).
The older kids used the truck (“Cool tread marks!”) as well as brushes to paint. Some of them stuck pieces of tissue paper on to their art as well for a textured effect (right middle and bottom pics). In all cases, the kids had fun and seemed to really like their glittery, fiery creations!
Artist Tip: For those artworks that aren’t completely dry by the end of the party, you can quicken up the process by using a hairdryer.
Fiery Tissue Paper Lantern Craft
You Will Need:
– red, orange and yellow tissue paper cut into squares
– a glass jar for each child
– paintbrushes
– a small LED flickering candle (like those used in jack-o-lanterns) for each child
– Mod Podge Glue, Sparkle (dries clear, shiny and glittery!) or watered down white glue
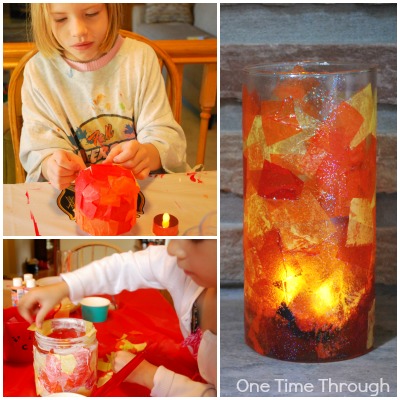
This is such an easy craft that turns out beautifully! (Unfortunately, my photos don’t do them justice.)
First, I showed the kids how to use a paintbrush to brush Mod Podge onto the jar, and then how to stick the tissue paper pieces into the glue.
As they were working, I reminded them to paint Mod Podge over top of all their tissue paper so that when it dried, their work would be protected under the “lacquer” and so that the glitter in the podge would be all over their jar.
When you put the LED candles inside, these lanterns are stunning (and safe!)
Artist Tip: Be sure to ask your guests to bring an artist’s smock (old t-shirt) to the party to protect their clothes from paints and glue.
Want more? Check out my post on how to make some absolutely amazing-looking Firefighting Cookies, Cupcakes and Favours.
Best,
To find even more fun and educational activities as well as positive parenting tips, follow me on Facebook, and Pinterest.


